Showing posts with label Card. Show all posts

Tuesday, July 5, 2016

You're the best Card and Challenge Entry

Hey guys! I have been working on a few different things and found a digital stamp that I just had to have. I made this new card based on a color and sketch challenge over at the Your Next Stamp Blog. 
Lets get on to the card....


I found the Digital Image on Etsy and then used my Spectrum Noir Markers to color it. 
Here are the colors I used

Sun: CT2, CT4
Flamingo: CR2, PP3, PP4, Black
Lake: TB2, TB4
Grass: CG2, CG4
Bucket: CG1, CG3
Shovel: OR2
Sand: EB2
White Gelly Roll Pen 

I am so excited to have entered this card into the challenge. I am working on a few new things for Technique Tuesday as well. I will be back tomorrow to share some new things :)

Thanks for stopping by!

Friday, June 24, 2016

Happy Birthday with Technique Tuesday

Hey Guys, Ashley here!! 

I have been having a rough couple of weeks with some family things. I am so excited to be putting up a new post and a new project!! Some of you may know that I am now on the Design Team for Technique Tuesday... It is so exciting!!!! Have you seen all of their cool dies and Stamps? If not, you need to go check it out HERE! 

Today for my card I wanted to make something different and you can never have too many Birthday Cards. I used a stamp set called Beary Sweet and then a brand new set called Bravo. I am loving how versatile everything is. If you'd like to get them click on the names above and it will take you over to the site :)

Here is a look at the front of my card... 

I used a 4" square card for this and it came out so cute. Using the Beary Sweet set I stamped the Balloons and then made some masks so that I could make a bouquet of Balloons. I then used my Spectrum Noir markers to color them. 


This is the inside where you can insert a gift card for that special someone after folding the card and making a slit with an exact knife. 

Thank you for stopping by today. I will be back to share some new exciting things Ive made this week. 

Monday, June 20, 2016

Technique Tuesday with Sympathy Card

So I made this card last week for my grandma before my grandpas funeral. It was a hard card to make but meant so much to the both of us. This stamp set is from Technique Tuesday and can be found at this link http://www.techniquetuesday.com/product/GSBlu.html
They also have matching dies if you are interested. 


I used the stitched ovals and rectangles from Lawn Fawn for the cut outs and distress inks to watercolor with. I have never made a card like this but is something I will be tryin again and again. 

If you have any questions or comments please leave them below and I will get back to you! Stay tuned there will be another project later this week. You will love it! 

Ashley 

Sunday, April 17, 2016

Sunflower Birthday Card

Hey everyone!! 
We are getting over some nasty colds and bronchitis in our house, so back to crafting :) YAY!! 

My mother in law always tells me all these kind of cards she would like and I make them for her. She is obsessed with flowers. We were looking around the Internet when she came to help and found a few she liked. I will be sharing one today and the others in coming days. 

I have decided that I need to make many more things with the stamps I already have :). So here is the first card that I made her using Lawn Fawn's Friendship Grows. 


I just love the colors and the way it came out. I used my Spectrum Noir markers to color it and found some brown twine to add to the bottom. I'll be back to show you the rest! 

Have a great weekend! 
Ashley 

Monday, February 15, 2016

Artsy Fartsy Birthday

Hey guys! I'm back again!! 
I am really trying to do this more and I'm loving the crafting. I have many many Sweet Stamp Shop stamps and some I have never used. I looked through my stash and decided to start making some cards with the sets I have. 

This card is made with the Artsy Fartsy stamp set. This set is actually retired but it may just eventually come back. 

You can do so many different things with this set. I am building my birthday card library since I don't have much. 

Here is the cute little card I made with this set...

I added some sequins to add to it and it came out wonderful! If you have never seen these stamps head on over to www.sweetstampshop.com and order you some! They are the best!! 

Thanks for stopping by today and I will be back tomorrow with a new card for the Lawnscaping Challenge. 

Ashley 


Friday, February 5, 2016

Lawn Fawn I Love You Card

Hello All......

It has been some years since I have posted anything on here. My babies are 3 and 4 now and letting me craft more. I am very excited to get back into making cards and paper crafts. It has been way too long. Since I had my first son in January 2012 I have been Crocheting tons and then had a second son in April 2013. It has been a wild ride but I would not change it for anything. I just love it. Ok, so enough about that... Lets talk a little bit about my card that I made, 1st card out of the gates and I am so proud of it. 

I have to tell you that I just discovered all these new supplies in card making and I am in Love. I LOVE Lawn Fawn Stamps!!! They are my absolute favorite. Then I have my Sweet Stamp Shop stamps that I am loving using in my planner and just recently started making cards with them. Im very new to Spectrum Noir Markers and I think they are great! I decided I wanted to make my Husband a Valentines Card this year since it has been so long. 

I went ahead and entered this card into the Lawnscaping Challenge #123 :)


So I made an A2 sized card with the Sweet Smiles Stamp and Die set from Lawn Fawn. I decided the whole thing needed to be pink, red and white. It turned out a lot better than I expected. 


I also used the Milo's ABC's set from Lawn Fawn for the I Love You Sentiment. 

I am so glad to be back at the crafting table again and I will be posting a lot more :) Please let me know if there is anything you would like to see and I would love to show you. 

Thanks for stopping by... Come back real soon!


Ashley 

Wednesday, December 28, 2011

1 last Merry Christmas Card

Good Morning All!!! 

I have one more Christmas card to share. I wanted to wait until I knew that the person I sent it to had it :). I really like the way it turned out and I think I am going to use the same cut soon and make a Layout. 

Just so you all know. I have been making some projects and stashing them aside to post real soon. We are still waiting for this little baby to be born and I feel like it wont be too much longer. I am making progress. I am Full Term now and now it's just a waiting game. 

Now on to our Card:


Recipe:
4 1/4 x 5 1/2 Card
4 x 5 1/4 Green Layer
3 3/4 x 5 Patterned Paper
Girl is a MyScrapChick file called Christmas Cuties
1 3/4 x 5 1/4 Green strip
Peachy Keen Wide Eyed Kids Face Assortment
TPC Stamps
Chalk
Brads
Stickles

I hope you enjoyed this card!! I just got my pics printed from this year and so I am going to be putting them together in Layouts and am also going to share the rest of the pregnancy album I have done :)

See you back here real soon!!

Friday, June 3, 2011

4th of July Card

I did make a few things today like I promised. I was so excited when my bestie came over to scrap for a few hours. She hasn't been here in a few weeks and I was missing her!!! I wanted to make a 4th of July card, but I also have a Graduation card and Birthday Card to make. I got one of them done and I will show you tomorrow. 


I used Paper Trey ink cardstock for the card base in A2 size
The white layer is 5 3/8 x 4 1/8
Stars Layer is 5 1/4 x 4
Kids cut @  3 3/4 using A Child's Year
ribbon is from dollar tree

I did not have a stamp for 4th of July, and with all the colors going on I though it was perfect without a sentiment on the front. 

Wednesday, April 6, 2011

Love You A Latte

Hello All,
I made this card the other day while my grandma was here. We actually both made one. I just found that paper at Craft Warehouse and has to use it. I just found out that our Craft Warehouse is closing and today starts the close out. I am so beyond bummed out about this since it is my Go-To store. I went there after work to look and I left right after I walked in. The line was all the way around the store and I couldn't even move to look around. Guess I know where I'll be going tomorrow =)


4 1/4 x 5 1/2 card
4 1/8 x 5 3/8 cup paper
Cup cut from A Childs Year @ 3 1/2
Brown Ribbon from Dollar Tree
Sweet Cheeks Stamps by ME using Heartfelt Thoughts

Thanks for stopping by!!!

Friday, March 18, 2011

Music Blog Hop


Welcome to the Music Blog Hop! Everyone on this hop has made some sort of project inspired by a song! It was so much fun!! You should have come to my blog from Tami over at http://tamiscraftconnection.blogspot.com. If you just came here then you are going to want to head over to Jillian's blog over at http://princessandthepaper.blogspot.com to start at the beginning. You are not going to want to miss what everyone has made for you to see!!

I picked the song Life Is A Highway by the Rascal Flatts, I just love that song. Here is the video:


This is my project for this song. 

I wanted just a cute simple card. 
The car and the Road are both from Everyday Paper Dolls 
Car cut @ 3.5"
Road cut @ 2"
Black Sharpie Pen to Doodle 
The car is a Metallic Paper

Here is the complete list to the hop in case you get lost:

Thanks for coming by... Your next stop is going to be Robin over at http://robinscrapnest.blogspot.com

Saturday, February 12, 2011

Valentine's Blog Hop is Here!!!


Thank You all for joining us today for this very fun and exciting Valentine's Blog Hop. You should have arrived here from Kara's Blog. If you just happened to stop here first then hop on over to Jillian's Blog to start. You do not want to miss anything on this hop. This hop is filled with exciting projects and giveaways!! There is also going to be a USTREAM tonight at 7 PM Central. If you go to Jillian's Blog you will find out all about it. 

I made 2 projects for the hop today. My first project is a Layout I made for Valentine's Day. I am hoping to just add my pictures when I get them done. Everything was made using the Sweethearts Cartridge.


Here is the recipe for the Layout:
Tree @ 9.10"
Couple @ 7"
Cupid @ 4"
Sweethearts @ 2.5" including shadow
Strips @ 4"
Photo Mats are 4 1/4 x 6 1/4 and 4 x 5 1/4

I got the paper from the Dollar Spot at Target a while ago. It's pretty nice weight. 

The next project I have for you is a Gatefold Card. It is my first one I have ever made so I am really excited about it. 


I also got the patterned paper for this in the Dollar Spot at Target and they were in a pack that was cut at 5 x 7 for you already.

Recipe:
Card is 5 1/2 x 4 1/4
2 1/2 x 4 cut twice for the front panel flaps
Scallop Circle @ 3.5"
Circle @ 2.90"
Lips @ 2"
Inside Mat is 5 1/4 x 4

Thank You so much for stopping by!!! I'm so excited you could make it.

Your next stop is KAREN

Here is the list for the hop just in case you get lost:
Ashley (ME)

Tuesday, January 18, 2011

High Heel Birthday

I just made this card for one of my friends. I really like how it turned out. This is the first time I am using the Paisley Cartridge. I got it at Michaels for $9.99, and I'm so glad I got it. 


All of the paper is just scraps out of my stash and the stamp is from the dollar bins at JoAnn. I also used my wonderful White Jelly Pen and the Clear Glitter Pen around the middle of the flower. 

Monday, January 17, 2011

*Birthday Cards*

These are 2 Birthday Card that I made today. I used my brand new Once Upon A Princess cartridge. I am so excited for this cart. Now I am just waiting for the princess faces to go along with it. 


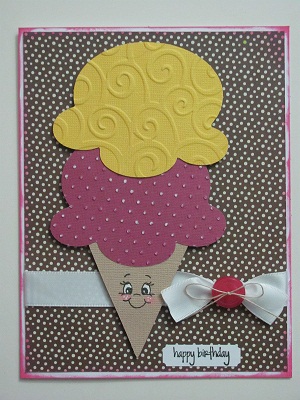
I used Swiss Dots and D'vine Swirls Cuttlebug folders on both of these cards. I also used white satin ribbon from Stampin Up. I got the buttons from the dollar section at Michaels. I also used some twine on the buttons.   The punch is from EK Success that cut out the Happy Birthday, which is a stamp also from the dollar bins. 

Saturday, January 8, 2011

First Valentines Card

I had watched Momo's Video on her Valentines day card and I saw a trick she did for her bows and I though that I just had to try. Mine always move and look bad. So I made this adorable Valentines Day card, I am very happy at the way it came out!! 


I used the Sweethearts Cartridge and a new stamp from Stampendous. The ribbon is from Michaels.

Monday, December 6, 2010

25 Days of Christmas: Day 6

Today I made this way cut card with 3 birds on parade. I love this Cartridge!! They have the cutest things on it, for every holiday and season...

Friday, December 3, 2010

25 Days of Christmas: Day 3

Hello All!!!


This morning I got to go to the Festival of Trees with my best friend and it was really cool. Took lots of pics!! :) But afterwards we went to Michaels, and Craft Warehouse and got some cool stuff. We have been working on Christmas gifts tonight. I managed to whip this card up and I am very impressed with it. It is made with Winter Frolic. I Love that cartridge...

Saturday, November 6, 2010

Christmas Candy Card

I just decided to make this shaped card tonight. I saw something like it on My Creative Time and I have been thinking about it ever since. I used the biggest Stamp from the Peachy Keen Assortment Pack.


I did everything with Esmerelda (My Gypsy). I didn't have to hide contour anything but I did flip the image and weld it together at the top. The candy is cut out at 4.75. This is all done with the Simply Charmed Cartridge. 

Sunday, October 31, 2010

Paper Cutz Challenge #65

These are 2 cards that I made for MPS Challenge for Monique and Brenda going through Breast Cancer Treatment this week. I sent these to both of them. 

Over at Paper Cuts Challenge this week it was to make a project, Card, or LO for breast Cancer Awareness. I am entering the first card in the challenge this week. 


Tuesday, October 12, 2010

Spice Up Your Thanksgiving - MPS Challenge

I made this for the My Pink Stamper Challenge to make something cute. I saw a tutorial on how to make this card with packets of stuff. I used Apple Cider for the treat inside. I computer generated the sentiment and it says Spice Up Your Thanksgiving. I used Create A Critter for the pumpkin on the front.


Tuesday, September 28, 2010

Jitterbuggin Challenge Sketch #19

We were celebrating fall on this challenge. We were to Follow the Sketch; Add Fall Elements (pumpkins, leaves, sunflowers, scarecrows, etc...); and to add something Plaid. This is the Sketch to follow...


 This is my interpretation of the sketch. I love this pumpkin on the Create A Critter cartridge. The cart is made from Craft cardstock and is a 5 1/2 card.